In this post we will create a blade component which we can reuse in any application where we want a file uploader, we will use Dropzone.js to add drag and drop uploading functionality, and laravel as a backend to store the uploaded file, It can upload an image or document which will be configurable using a config file. Let’s get started.
What is Laravel Blade Component
A component is laravel partials but they give you a clean way to pass data into partial view using slots. In fact, you can use any partial as a component, it was introduced in Laravel 5.4. Instead of @include('my-partial', ['title' => 'My Title']) you can use @component('my-partial') and you can pass data as array or you can use @slot('title') My Title @endslot() from inside component to pass the title. For a simple thing like title it’s better to stick with passing array but if you want to pass some HTML as the body of the component slot can help and keep it clean.
Now that you know whats a component lets build our uploader component.
Create a Laravel 5.5 App
Create a new Laravel 5.5 app and configure the database credentials in .env file. Once it’s installed run the php artisan make:auth to scaffold authentication, it’s optional but it will give you layout file with a home resources/views/home.blade.php view which we will use to test our component later.
Now we need to fetch the dropzone, add "dropzone": "^5.1.1" in package.json as dependency and run npm install to complete the installation.
Let’s require it in resources/assets/js/bootstrap.js file by adding:
try {
    window.$ = window.jQuery = require('jquery');
    // require dropzone
    window.Dropzone = require('dropzone');
    require('bootstrap-sass');
} catch (e) {}
Once that is done, now copy the node_modules/dropzone/src/dropzone.scss into resources/assets/sass/ folder and import it in app.scss:
...
// Variables
@import "variables";

// Dropzone
@import "dropzone";
...
If you want you can customize the look of dropzone, you can do it by editing this dropzone.scss file, now run npm run watch to run the build script and watch for changes.
Build Dropzone uploader component
Let’s build our dropzone powered uploader, first create a file in resources/views/partials/uploader.blade.php, let’s add a minimum markup to add dropzone.
@php $dropzoneId = isset($dz_id) ? $dz_id : str_random(8); @endphp
<div id="{{$dropzoneId}}" class="dropzone">
    <div class="dz-default dz-message">
        <h3>{{ $title or  'Drop files here or click to upload.'}}</h3>
        <p class="text-muted">{{ $desc or 'Any related files you can upload' }} <br>
            <small>One file can be max {{ config('attachment.max_size', 0) / 1000 }} MB</small></p>
    </div>
</div>
<!-- Dropzone {{ $dropzoneId }} -->

@push('scripts')
<script>
    // Turn off auto discovery
    Dropzone.autoDiscover = false;

    $(function () {
        // Attach dropzone on element
        $("#{{ $dropzoneId }}").dropzone({
            url: "{{ route('attachments.store') }}",
            maxFilesize: {{ isset($maxFileSize) ? $maxFileSize : config('attachment.max_size', 1000) / 1000 }},
            acceptedFiles: "{!! isset($acceptedFiles) ? $acceptedFiles : config('attachment.allowed') !!}",
            headers: {'X-CSRF-TOKEN': "{{ csrf_token() }}"}
        });
    })
</script>
@endpush
We have added some configuration option like dz_id which will be unique dropzone container ID so we can have more than one uploader on a page. After that, we have dz-message container which we have given $title and $desc variable to customize with a default message.
Add @stack(‘scripts’) in
resources/views/layouts/app.blade.phpbefore closing body tag so we can push any scripts from blade view.
The first thing we have done in script block is turned off auto discovery, by default Dropzone will attach itself anything which has class dropzone applied to, we don’t want that so we set it to false.
In dropzone configuration, we have given options to pass the maxFilesize, acceptedFiles etc to further customize individual instance according to your need.
Config file for attachment
Above view file has used config('attachment.allowed') and max_size to customize the uploader, let’s create the config file and add some settings:
return [
    // Allowed file types with . prefix
    'allowed' => '.pdf,.doc,.xls,.docx,.xlsx,.jpg,.png,.gif,.jpeg',

    // Max file size in KB
    'max_size' => 5000
];
Now component is ready, let’s use it in resources/views/home.blade.php view.
Register and login to see the dashboard where we will show the uploader component.
We can use it both ways, using @include() or using @component() directive.
@extends('layouts.app')

@section('content')
<div class="container">
    @component('partials.uploader')
        @slot('title')
            Upload only photos
        @endslot
        @slot('acceptedFiles', '.jpg,.png')
    @endcomponent
    <!-- OR -- >
    @include('partials.uploader', [
        'title' => 'Upload only photos ',
        'acceptedFiles' => '.jpg,.png'
    ])
</div>
@endsection
Next, we need to set the attachment route. Since we already created a resource controller we can open the routes/web.php and register the route.
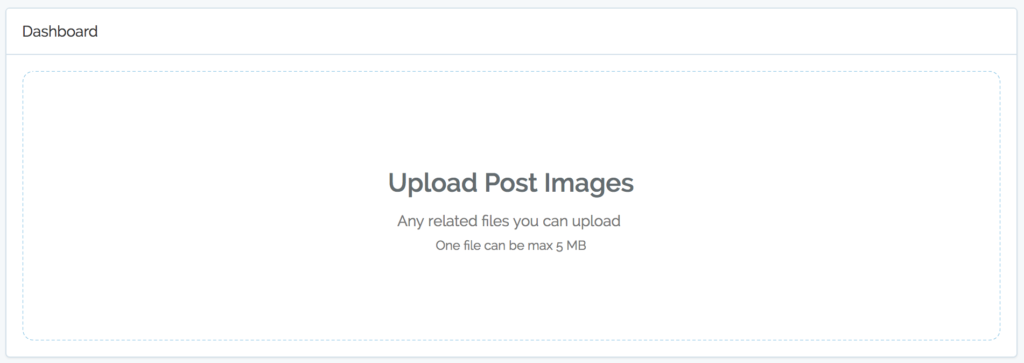
Route::apiResource('attachments', 'AttachmentController');If everything went well you should see an uploader like this:
Currently its not actually uploading anything to the server lets setup laravel backend to save files.
Note: I have done some styling in resources/assets/sass/dropzone.scss which you can get from repo to make it look better.
Model & Migration to store uploaded files
We want it to be reusable so I am going to create Attachment model since any upload is most likely be to related (attached) to some other entity, like a post can have many images as upload. Let’s create the model with migration and a resource controller by running php artisan mak:model Attachment -mr and update the migration like this.
Schema::create('attachments', function (Blueprint $table) {
    $table->increments('id');
    $table->string('filename');
    $table->string('uid');
    $table->integer('size');
    $table->string('mime', 100);
    $table->morphs('attachable');
    $table->timestamps();
});
We are storing filename which will be client original filename and the uid which is going to be returned by laravel filesystem upon file save. One thing to note I am using polymorphic relation so we can accept upload on different types of Model.
Attachment Model
This model will be responsible to store and keep the file system in sync with rows, if a user deletes an attachment row, the related file will be also deleted by hooking into eloquent model event.
class Attachment extends Model
{
    protected $guarded = [];

    protected $appends = ['url'];

    public function attachable()
    {
        return $this->morphTo();
    }

    public function getUrlAttribute()
    {
        return Storage::url($this->uid);
    }

    public static function boot()
    {
        parent::boot();

        static::deleting(function($attachment){
            // delete associated file from storage
            Storage::disk('public')->delete($attachment->uid);
        });
    }
}
Let’s create the Post model as well with migration using php artisan make:model Post -m so we can associate the uploaded image to it.
protected $fillable = ['title', 'body', 'user_id'];

public function attachments()
{
    return $this->morphMany(Attachment::class, 'attachable');
}
Upload file in Laravel
Enough with the model setup let’s open the AttachmentController and implement the store method.
public function store(Request $request)
{
    $request->validate([
        'file' => 'required|file|max:5000|mimes:' . $this->getAllowedFileTypes(),
        'attachable_id' => 'required|integer',
        'attachable_type' => 'required',
    ]);

    // save the file
    if ( $fileUid = $request->file->store('/upload', 'public') ) {
        return Attachment::create([
            'filename' => $request->file->getClientOriginalName(),
            'uid' => $fileUid,
            'size' => $request->file->getClientSize(),
            'mime' => $request->file->getMimeType(),
            'attachable_id' => $request->get('attachable_id'),
            'attachable_type' => $request->get('attachable_type'),
        ]);
    }

    return response(['msg' => 'Unable to upload your file.'], 400);
}

/**
 * Remove . prefix so laravel validator can use allowed files
 *
 * @return string
 */
private function getAllowedFileTypes()
{
    return str_replace('.', '', config('attachment.allowed', ''));
}
We validate the request for a file and check the mime type is in our configuration allowed list. We are also asking for attachable_id and attachable_type which will be post id and App\Post in this case to associate an upload with the Post.
Next, we call store method on file to move the uploaded file to laravel default public disk, which is configured in config/filesystems.php, you can change that to some other disk if you like.
Run
php artisan storage:linkto create symlink for public disk
Once the file is uploaded it will give the unique file id/path which we then store in DB along with filename, size, and mime type and attachable info.
Send Additional field with dropzone upload request
It’s most likely you will need to give some option to pass additional data along with file upload, luckily dropzone has params: {} option which we can add fields that will be sent with the file. Open the uploader.blade.php and add this below headers.
...
headers: {'X-CSRF-TOKEN': "{{ csrf_token() }}"},
params: {!! isset($params) ? json_encode($params) : '{}'  !!},
...
To send additional data using component we pass it ask key value pair.
@component('partials.uploader', [
    'title' => 'Upload Post Images',
    'params' => [
        'attachable_id' => 1,
        'attachable_type' => 'App\Post'
    ],
    'acceptedFiles' => '.jpg,.png'
])
@endcomponent
Finally, if you try to upload, it should upload the file with correct relation and file. Make sure you ran php artisan migrate to setup posts table beforehand.
Show files already stored on server
Dropzone gives tons of option and you can customize it on every step using its event system. Since we have uploaded file for a Post, we can get the files using $post->attachments relation. Now to show them in dropzone UI we need to hook into init event call and add already uploaded files.
...
params: {!! isset($params) ? json_encode($params) : '{}'  !!},
init: function () {
    // uploaded files
    var uploadedFiles = [];

    @if(isset($uploadedFiles) && count($uploadedFiles))

    // show already uploaded files
    uploadedFiles = {!! json_encode($uploadedFiles) !!};
    var self = this;

    uploadedFiles.forEach(function (file) {
        // Create a mock uploaded file:
        var uploadedFile = {
            name: file.filename,
            size: file.size,
            type: file.mime,
            dataURL: file.url
        };

        // Call the default addedfile event
        self.emit("addedfile", uploadedFile);

        // Image? lets make thumbnail
        if( file.mime.indexOf('image') !== -1) {

            self.createThumbnailFromUrl(
                uploadedFile,
                self.options.thumbnailWidth,
                self.options.thumbnailHeight,
                self.options.thumbnailMethod,
                true, function(thumbnail) {
                    self.emit('thumbnail', uploadedFile, thumbnail);
            });

        } else {
            // we can get the icon for file type
            self.emit("thumbnail", uploadedFile, getIconFromFilename(uploadedFile));
        }

        // fire complete event to get rid of progress bar etc
        self.emit("complete", uploadedFile);
    })

    @endif
}

// add following in the Global scope //

// Get Icon for file type
function getIconFromFilename(file) {
    // get the extension
    var ext = file.name.split('.').pop().toLowerCase();

    // if its not an image
    if( file.type.indexOf('image') === -1 ) {

        // handle the alias for extensions
        if(ext === 'docx') {
            ext = 'doc'
        } else if (ext === 'xlsx') {
            ext = 'xls'
        }

        return "/images/icon/"+ext+".svg";
    }

    // return a placeholder for other files
    return '/images/icon/txt.svg';
}
Now we need to pass the uploaded files in the component. Above javascript code is well commented you can understand what it does. Before testing open the HomeConroller@index and pass the $post into view like return view('home')->with('post', Post::find(1)); and now we can access all attachment for a post like this:
@component('partials.uploader', [
    ....
    'acceptedFiles' => '.jpg,.png',
    'uploadedFiles' => $post->attachments->toArray()
])
@endcomponent
Show Icons for documents in dropzone
By default, dropzone will show a thumbnail for images but any none image file will be presented as gray boxes, let’s hook into addedfile event inside dropzone’s init function to show the icon, you have already see the implementation of getIconFromFilename(file) above.
// Handle added file
this.on('addedfile', function(file) {
    var thumb = getIconFromFilename(file);
    $(file.previewElement).find(".dz-image img").attr("src", thumb);
})
You will need some icons for each file type, I have used svg icon since they are scalable and light, but any square image will work preferably 128px in size. Icons are named after the file extension, like doc.svg, xls.svg, pdf.svg etc. Place icons in public/images folder. If you want to change the path please tweak the getIconFromFilename(file) function to point to the new location for icons.
Now since we can list uploaded files, let’s try to add an option to remove a file. Once a user clicks it, the file will be deleted from the dropzone UI and from the server.
Remove a uploaded file
Removing a file is very easy, dropzone gives an option to add remove file functionality, just add addRemoveLinks: true in configuration after the url:
$("#{{ $dropzoneId }}").dropzone({
    url: "{{ route('attachments.store') }}",
    addRemoveLinks: true,
    ...
Next thing is to delete the removed file from the server. In init function add an event listener for removefile event.
// handle remove file to delete on server
this.on("removedfile", function (file) {
    // try to find in uploadedFiles
    var found = uploadedFiles.find(function (item) {
        // check if filename and size matched
        return (item.filename === file.name) && (item.size === file.size);
    })

    // If got the file lets make a delete request by id
    if( found ) {
        $.ajax({
            url: "/attachments/" + found.id,
            type: 'DELETE',
            headers: {
                'X-CSRF-TOKEN': "{{ csrf_token() }}"
            },
            success: function(response) {
                console.log('deleted');
            }
        });
    }
});
In above handler we try to find the file in uploaded files array, if we found it we make an ajax call to attachments/{id} endpoint and delete it. Let’s implement the destroy method on AttachmentController.
public function destroy(Attachment $attachment)
{
    return (string) $attachment->delete();
}
I have kept it very simple for brevity, but in real world app it must authorized any action which changes your data in any way.
Error Handling
Things can go wrong on the server, if validation failed currently our API response will not be in a format which dropzone can render properly, we need to again hook into ‘error‘ event from init function to handle error properly.
// Handle errors
this.on('error', function(file, response) {
    var errMsg = response;
    if( response.message ) errMsg = response.message;
    if( response.file ) errMsg = response.file[0];

    $(file.previewElement).find('.dz-error-message').text(errMsg);
});
With that, we have a reusable component/partial to upload any document and images and list all the uploaded files with lots of configuration option. All the source code is available on GitHub, please check and don’t forget to share and comment if you find it useful.
Hi,
I try make it work for my products page instead of posts and I changed `attachable_type’ => ‘AppPost’` to `attachable_type’ => ‘AppProduct’` but I get `Undefined variable: product` error, I also want to use public_path storage instead of app storage where should i setting that?
Thanks.
hi Robert, it seems you have forgot to pass
$productvariable into view, I can help if you can share the code over github. also by default its going to upload directly into public storage, you just need to runphp artisan storage:linkand all the uploaded files will be accessible publicly.hi saqueib, I already passed my product to my view because i’m using this in my products create blade, so instead of making several file upload i want use this method to upload all my product photos at once. here is my gist: https://gist.github.com/robertnicjoo/3dd1bbd1ccb9d3a7c0c36320d7e04d65
Hey! Great tutorial! Just got a little stuck on creating the submit form, there is a banner saying “Register and login to see the dashboard where we will show the uploader component.” although I can’t find a way to register or login. Could you please help me with the issue or give me a hint how to upload files using dropzone?
Hi Saqueib,
Firstly, I would like to tell you that you made awesome stuff here!
Everything is fine when used “normaly” but I have a problem with this component when I try to use this in an ajax response (so after the page load) the dropzone is not working.
The DOM is present with the random ID but nothing works. And I have this error message `Dropzone already attached.` despite the fact that on the default page (before ajax call) I don’t have any dropzone component.
Any idea ?
Thanks Eric for your kind words, your issue is simple, dropzone tries to automatically attach to any element with class of dropzone, it can be turned off by
http://dropzone.js
// Immediately after the js include
Dropzone.autoDiscover = false;
Thanks Saqueib, I had also another problem, this may help other people.
I added @push(‘scripts’) in the uploader.blade.php but when I removed that, everything worked like a charm.
When I try to upload an image, the image icon is displayed but I get the error message: “The given data was invalid”. Also, whatever I use, @component or @include, I need to put two of them to get at list the image icon displayed in the second Dropzone area (the first area seems not detected by Dropzone). Could you maybe provide a full source code to illustrate your article ?
Hi Saqueib,
I would like to add a preview link to the uploaded files.
So I added this in
uploader.blade.phpthis.on("success", function(file, response) {
var a = document.createElement("A");
var t = document.createTextNode("Preview");
a.href = response.url;
a.target = "_blank";
a.appendChild(t);
a.style = "cursor: pointer";
file.previewTemplate.appendChild(a);
});
This is working fine when I upload a new file but not working for the files already uploaded.
I tried to bind this with
completeoraddedfileevents but that’s not working. Can you help me?I added this
var d = document.createElement("DIV");

                        d.style = "text-align :center";

                        var a = document.createElement("A");

                        var t = document.createTextNode("Preview");

                        a.href = uploadedFile.dataURL;

                        a.target = "_blank";

                        a.appendChild(t);

                        a.style = "cursor: pointer;";

                        d.appendChild(a);

                        uploadedFile.previewTemplate.appendChild(d);
Just after
self.emit("thumbnail", uploadedFile, getIconFromFilename(uploadedFile));And this does the trick! But I stll don’t know why I can’t bind it to the thumbnail event …
Hi, I have updated source code link to full repository, check that out if you are facing any issues